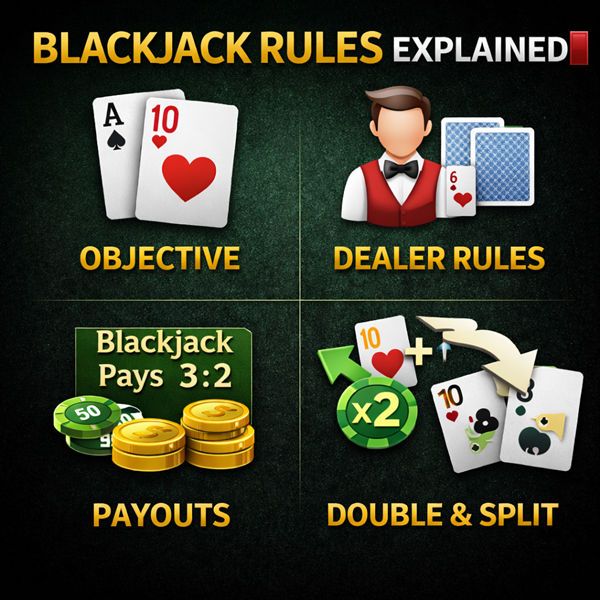
How to Read a Blackjack Strategy Chart (Step-by-Step Guide)
📊A blackjack strategy chart looks intimidating at first glance. It’s a grid full of numbers, letters, colors, and abbreviations that can feel overwhelming — especially to new players. But once you understand how to read it, the chart becomes one of the simplest and most powerful tools in the game.
Before learning shortcuts or tricks, it’s important to understand that the chart itself is the strategy. As explained in our Blackjack Basic Strategy guide, every correct decision in blackjack is already accounted for in this chart, based on mathematics rather than intuition. This article will show you exactly how to read it, row by row and column by column, without confusion.
🧠 What a Blackjack Strategy Chart Represents
A blackjack strategy chart is a visual map of optimal decisions. Each square represents the mathematically best move for a specific situation: your hand versus the dealer’s upcard.
The chart assumes:
- Standard blackjack rules (which can vary)
- Long-term play, not short-term outcomes
- No card counting or betting systems
Its purpose is simple: tell you which decision loses the least money over time.
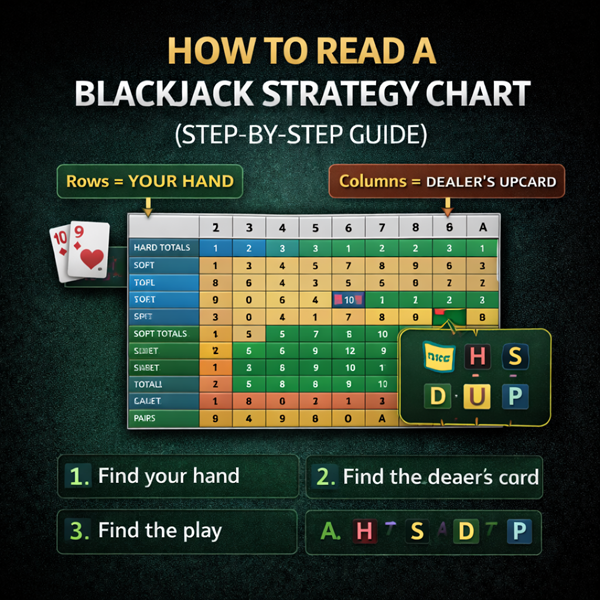
🧩 The Two Axes of the Chart
Every blackjack strategy chart works the same way, regardless of design.
👉 Rows = Your Hand
The rows on the left represent the player’s hand. These are usually grouped into:
- Hard totals (no usable Ace)
- Soft totals (Ace counted as 11)
- Pairs (two identical cards)
👉 Columns = Dealer’s Upcard
The columns across the top represent the dealer’s visible card, typically from 2 through Ace.
To use the chart, you:
- Find your hand on the left
- Find the dealer’s upcard on the top
- Follow the row and column until they intersect
That intersection tells you the correct play.
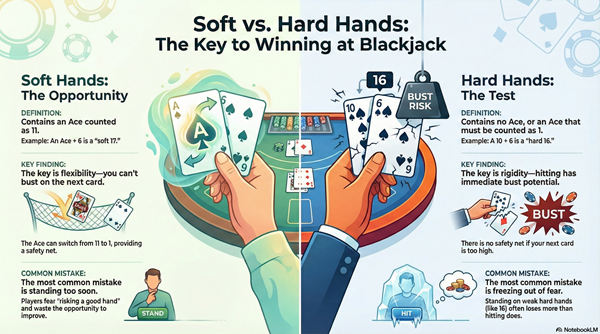
🂡 Understanding Hard Hands
Hard hands are totals without an Ace counted as 11. Examples include 12, 16, or 10-6.
On the chart:
- Hard hands are usually listed first
- Totals range from 5 through 17+
For example:
- A hard 16 versus a dealer 10 will often show H (Hit)
- This surprises many players, but it reflects math — not comfort
Hard hands are where players most often mistrust the chart. The key is remembering that the chart is designed to minimize losses, not avoid busting emotionally.
🂱 Understanding Soft Hands
Soft hands include an Ace counted as 11, such as A-6 or A-7.
On the chart:
- Soft hands are labeled as A-2 through A-9
- These hands allow more aggressive play
Soft totals often recommend:
- Doubling down against weaker dealer cards
- Hitting in situations that feel risky but aren’t
This is because the Ace provides flexibility. The chart takes full advantage of that safety net.
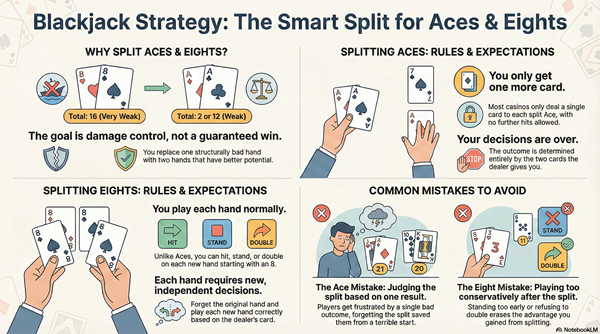
🔀 How Pairs Are Shown on the Chart
Pairs are usually listed in a separate section of the chart.
Common examples:
- 8-8
- A-A
- 10-10
Each pair has unique logic:
- Some pairs should always be split
- Some should never be split
- Some depend heavily on dealer upcard
The chart accounts for the long-term value of turning one hand into two, even when it feels uncomfortable in the moment.
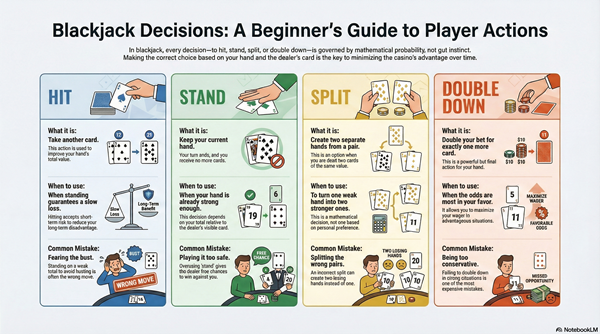
🅰️ What the Letters Mean (H, S, D, P, R)
Most strategy charts use abbreviations:
- H = Hit
- S = Stand
- D = Double (or hit if doubling isn’t allowed)
- P = Split
- R = Surrender (or hit if not allowed)
If you see a double letter like Ds, it usually means:
Double if allowed, otherwise stand.
Always check the legend — different charts may use slightly different notation.
⚠️ Why Rule Variations Matter When Reading the Chart
Not all blackjack charts are interchangeable.
Charts are built for specific rules, such as:
- Number of decks
- Dealer hits or stands on soft 17
- Doubling restrictions
- Surrender availability
Using the wrong chart for the rules you’re playing under increases the house edge — even if you follow it perfectly.
As covered in our Blackjack Rules Explained article, knowing the table rules comes before choosing the correct chart.
🧪 Common Mistakes Players Make With Strategy Charts
Even players who use charts make errors. The most common ones include:
- Confusing hard and soft hands
- Misreading the dealer’s upcard
- Ignoring surrender options
- Using a chart for the wrong rule set
- Abandoning the chart after a loss
The chart does not react to streaks or emotions. If you override it, you are no longer playing basic strategy.
🧠 Do You Need to Memorize the Chart?
Memorization is helpful but not required immediately.
Many players:
- Use a small reference card
- Study one section at a time
- Practice with free online trainers
Over time, most common decisions become automatic. The goal is not perfection on day one — it’s consistency.
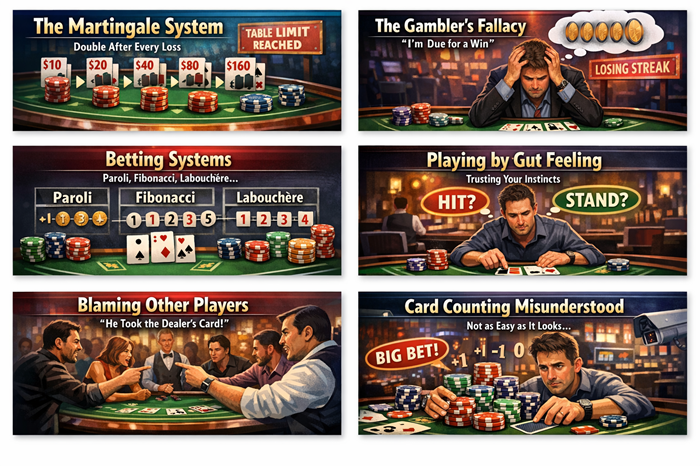
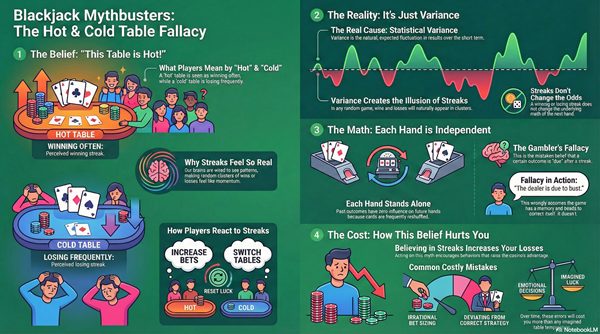
📌 Why the Chart Beats “Feel-Based” Decisions
Every square on a blackjack strategy chart represents millions of simulated hands. No individual experience, hunch, or streak outweighs that data.
When players say:
“The chart failed me,”
What they really mean is:
“Variance showed up.”
The chart doesn’t eliminate losses. It ensures losses are minimized.
🔚 Final Thought: The Chart Is the Strategy
There is no deeper layer hiding beneath the blackjack strategy chart. It is not a suggestion. It is the strategy itself, expressed visually.
Once you understand how to read it, blackjack becomes quieter. Decisions feel less dramatic. Losses feel less personal.
That calm is not a coincidence — it’s math doing its job.